How to make Washi Tape
I love washi tape, I have bundles of it. Everytime I find a unique design or color I have to have it. I started to wonder how I could make my own washi tape. I experimented with several different things but I eventually settled on this. Here is a tutorial about how to make washi tape. I made a rainbow design but you could of course use any color that you wanted.
How to Make Washi Tape
You will need:
- Craft sheet
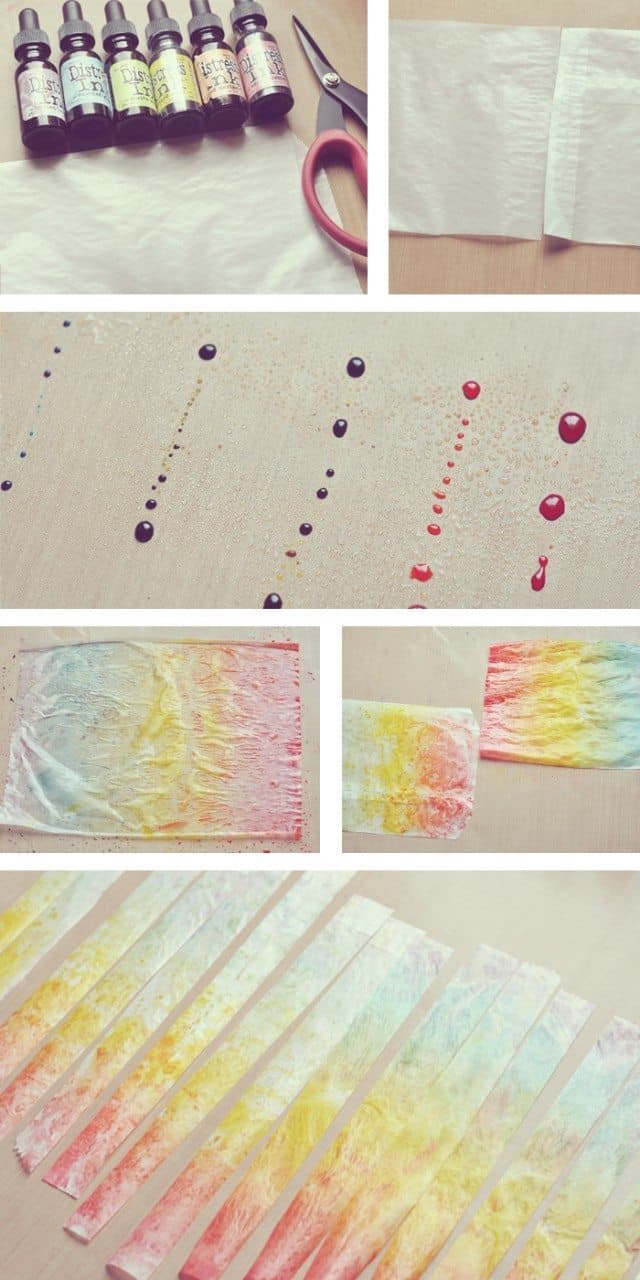
- Reinkers – any brand will do. I used distress reinkers in milled lavender, tumbled glass, shabby shutters, mustard seed, dried marigold and worn lipstick
- Glassine bag or tissue paper – In my example I used a glassine bag because I like the texture but tissue paper will also work and give a feel more like washi paper
- Scissors
- Water spray bottle
- Double sided tape like Miracle Tape
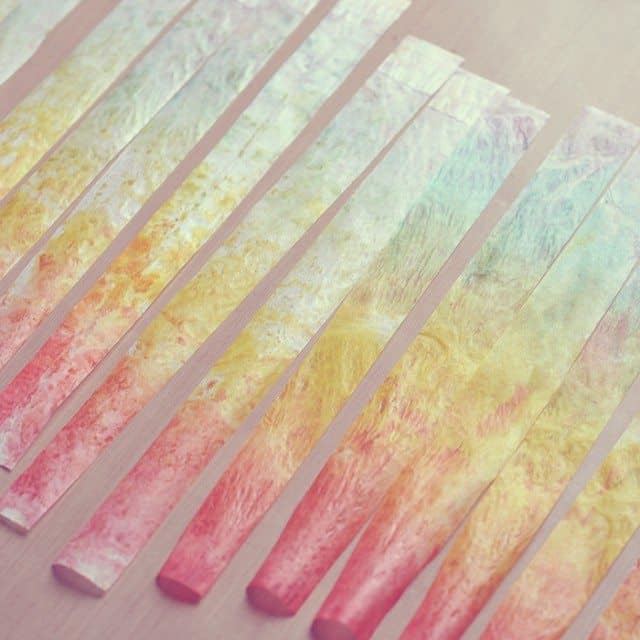
This homemade washi tape is in a perfect rainbow. I love rainbows and I love color when I’m scrapbooking or making cards.
- Cut open your glassine bag
- Lay down streams of reinker on a craft sheet
- Spray reinker with water to spread
- Lay the glassine bag in the reinker. Keep lifting the piece of bag and placing it back in the reinker until you have good coverage.
- Let dry
- Add double sided tape and cut into strips. These ‘washi strips’ should be somewhat transparent just like real washi tape.
You also use these strips like regular paper strips and glue them down with your preferred adhesive. I just find it easier to attach double sided tape to them. You can cut them in different sizes to match your double sided tape. The glassine bags will give the washi tapes a waxy sort of feel.
Hopefully you enjoyed the tutorial on how to make washi tape. Don’t forget to pin this and share it with your friends on facebook.