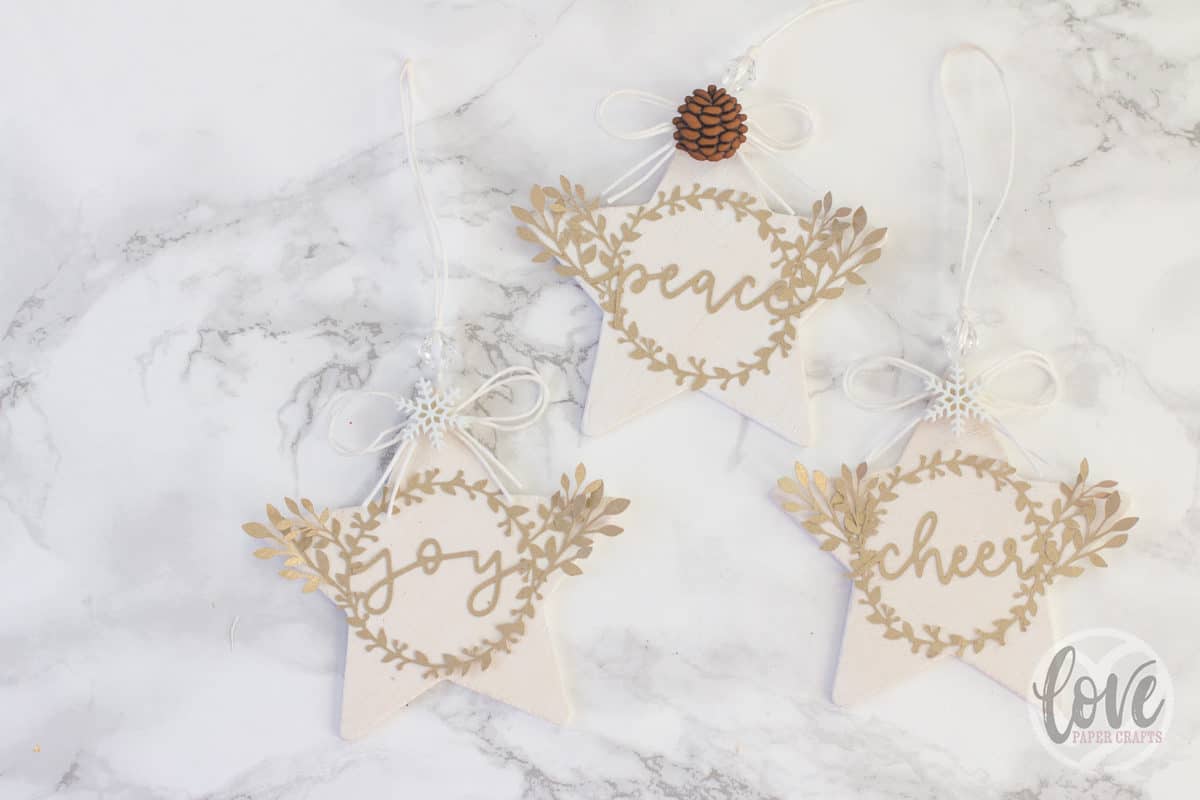
Wood Veneer Hand Lettered Ornaments
Welcome to the 2017 Ornament Exchange & Blog Hop! This year, there are 47 amazing bloggers participating in the exchange. The rules of the challenge were simple: be partnered with a fellow blogger, create a handmade ornament for $15 or under, create a tutorial, and ship the ornament off to a new home!
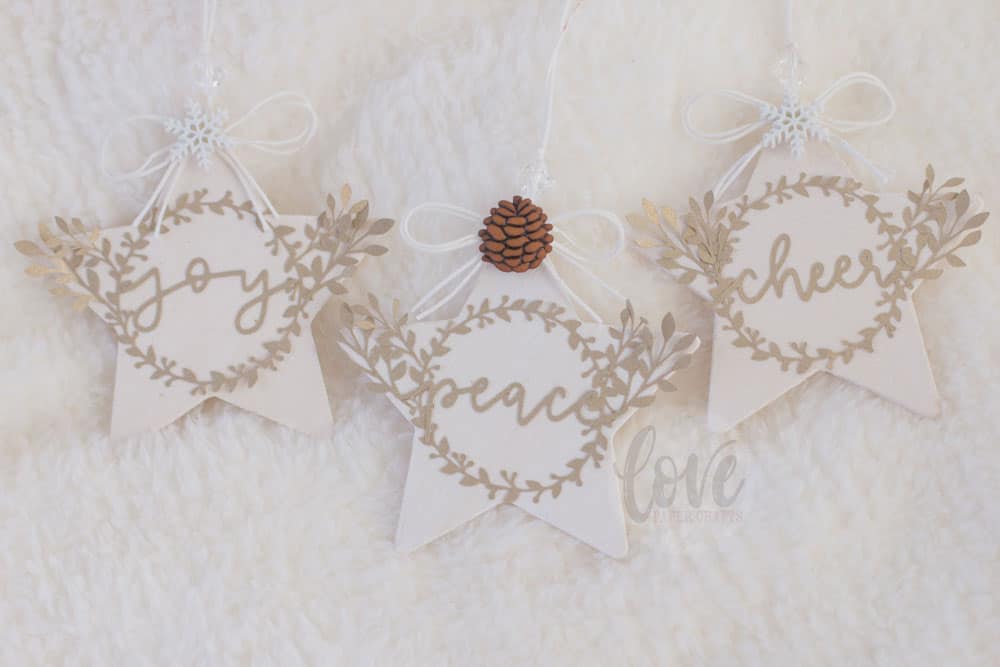
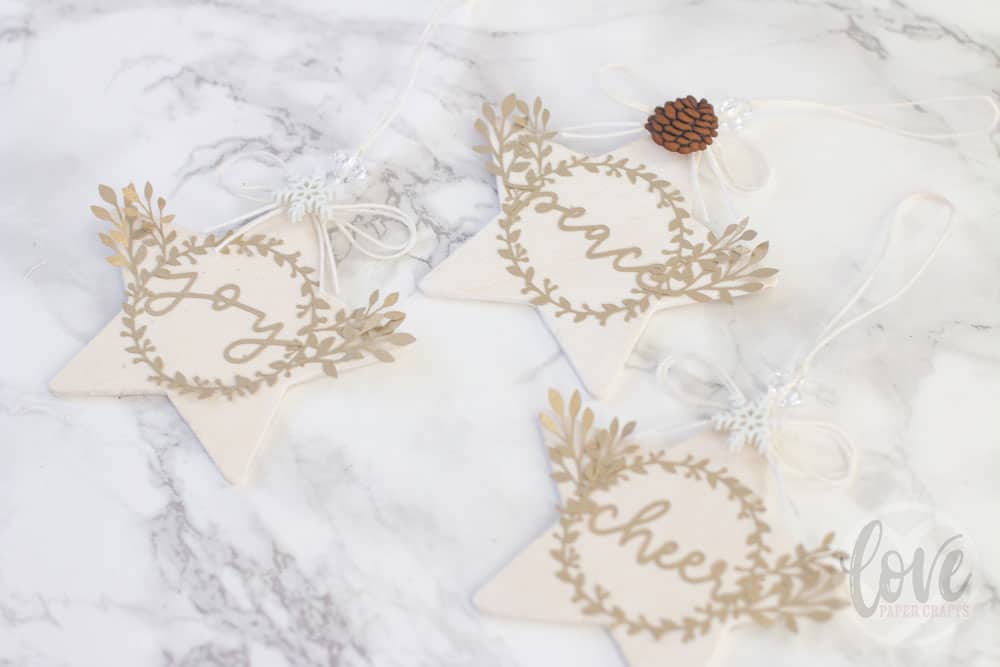
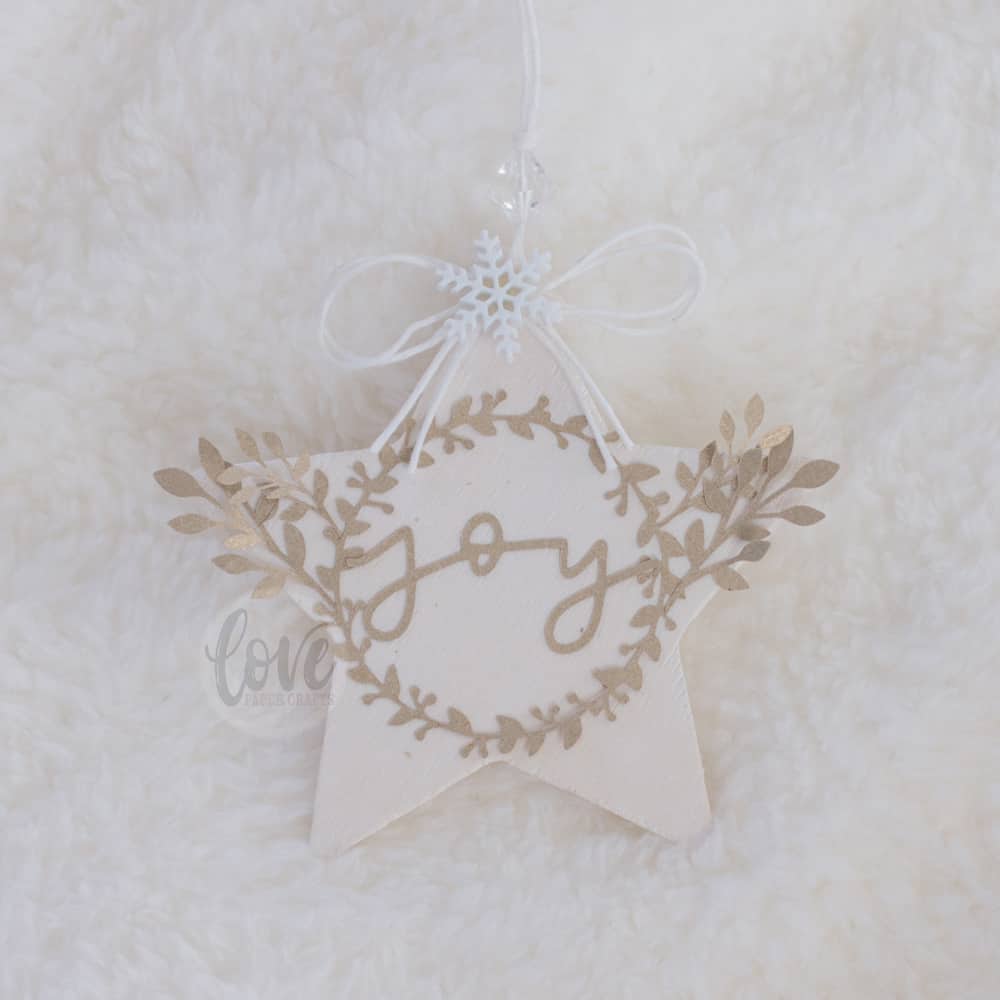
My partner was Debbie from Tweak and Style. She decorates for Christmas in a traditional style and loves white, gold and natural elements. I think I can work with that! White and gold are two of my favorite Christmas colors. So I set out to make a beautiful handmade ornament for the exchange and ended up creating a cute little wood veneer star ornament.

Meet the 2017 Ornament Exchange Hosts
Erlene ⋅ My Pinterventures Kim · Made In A Day Amanda · Domestically Creative
Shirley · Intelligent Domesticatons Michelle · Our Crafty Mom
Beverly · Across the Blvd. Christene · Key to Inspiration Pili ⋅ My Sweet Things
Nicki · Sweet Parrish Place Megan · C’mon Get Crafty
Hilary · Raising Fairies and Knights Emily · Two Purple Couches
Tina · One Crafty Mess Marie · The Inspiration Vault Debra · Shoppe No. 5
Trisha · Rosewood and Grace Jeanie · Create and Babble Katrin ⋅ Kreativ K
Terri · Christmas Tree Lane Maureen · Red Cottage Chronicles
Toni ⋅ Small Home Soul Ula ⋅ Lulu & Celeste Sue ⋅ A Purdy Little House
Pamela · Home On The Corner Lorelai ⋅ Life with Lorelai Cindy ⋅ DIY Beautify
Debbie ⋅ Tweak and Style Stephanie ⋅ Swoodson Says Chelc ⋅ Inside the Fox Den
Susan ⋅ Super Mom – No Cape! Molly ⋅ Just a Little Creativity
Roseann ⋅ This Autoimmune Life Angela ⋅ Simply Beautiful by Angela
Vicki and Jenn ⋅ 2 Bees in a Pod Joanne ⋅ Our Unschooling Journey
Tylynn ⋅ Bitterroot DIY Sam ⋅ Raggedy Bits Mary ⋅ The Boondocks Blog
Cyn ⋅ Creative Cynchronicity Dione ⋅ Clever Chameleon Quilting
Erica ⋅ Erica Ever After Chelsea ⋅ Love Paper Crafts Evija ⋅ From Evija with Love
Samantha ⋅ Little Bits of Home Hope ⋅ Hopes Crafty Niche Anne ⋅ Orange Bettie
Pam · P.S. I Love You Crafts
Handmade Ornament Instructions
You don’t need much to complete this ornament. My supplies were:
- Wood veneer stars
- Beads and buttons for decorating (optional)
- Gold Paper die cut into small foiliage and hand lettered words
- White Twine
- White acrylic paint and paint brush
- Crop-A-Dile Big Bite
- Glue Pen
- Hot glue gun
- Paper Towels
The hand lettering used on this ornamnet is from my free hand lettered Christmas words cut file. You can always write on the wood veneer with a sharpie marker if you want a true hand lettered/written look.
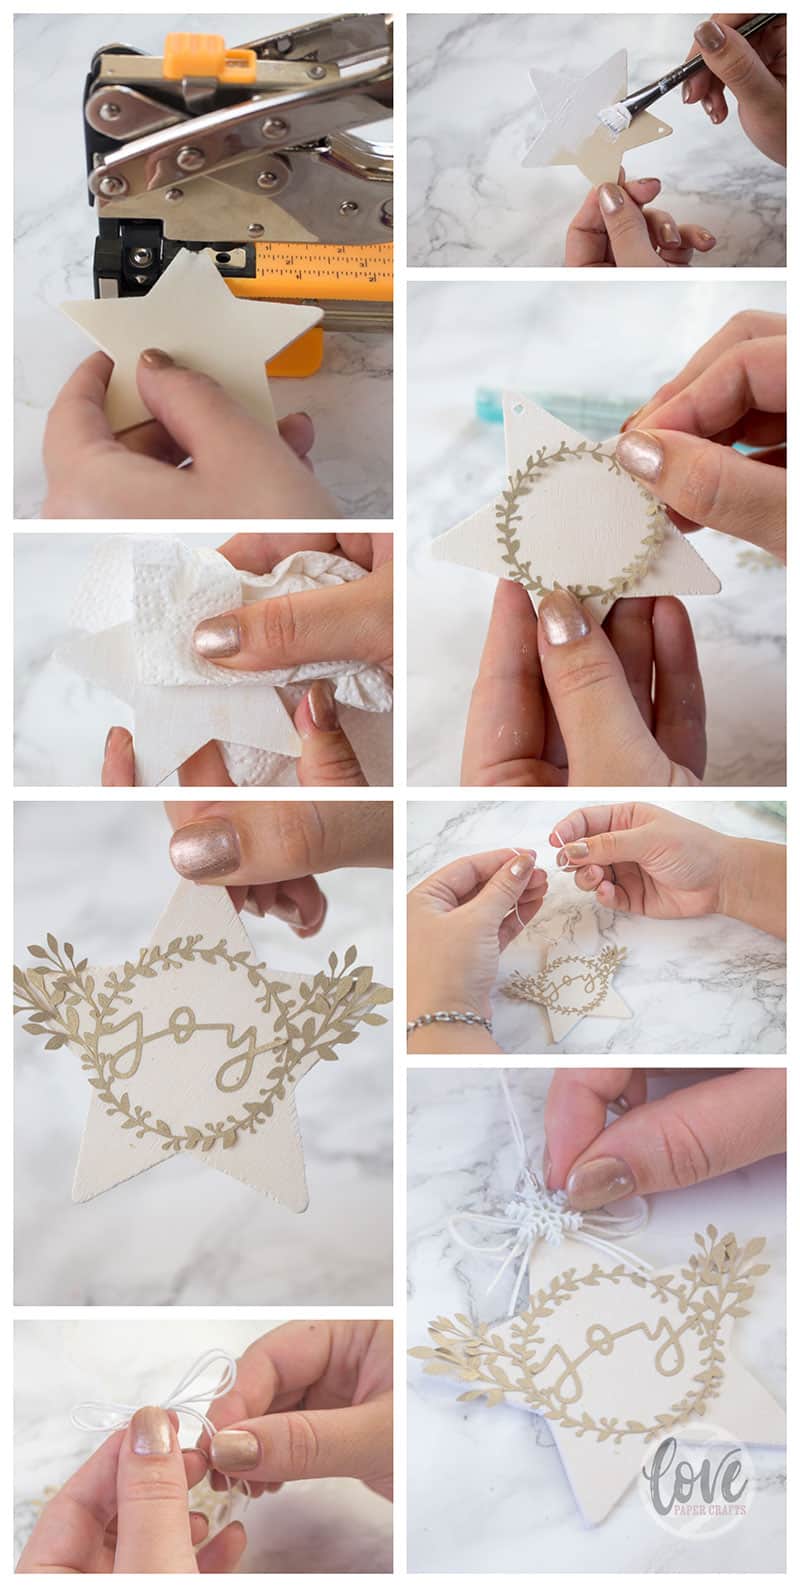
- Punch or drill a hole in your wood veneer. I used the Crop-A-Dile Big Bite and was pretty amazed when it punched a perfect little hole! Way to go We-R-Memory Keepers. Way to go. If you don’t have anything to make a hole just glue a piece of ribbon or twine onto the back to hang it with.
- Paint your wood veneer any color you like. I used white acrylic paint and painted both sides. Things got a little messy but I like it that way.
- While the paint was still wet, I took a paper towel and wiped it across the star. This made the paint look like whitewash and I love it!
- Begin layering pieces of paper foliage and your wreath. I choose a gold/champagne color paper that has just a touch of shimmer to it.
- Use a glue pen and add some pretty wreath and leaf die cuts. If you don’t have a die cutting machine you can use stickers too. I add the hand lettered word die cut last.
- Loop a piece of twine through the hole and tie it off. I added a clear glass bead for some sparkle and bling and tied another knot above it.
- I didn’t like the way the hole looked so I finished it off with a bow. I tied a bow with two pieces of twine and used hot glue to attach it.
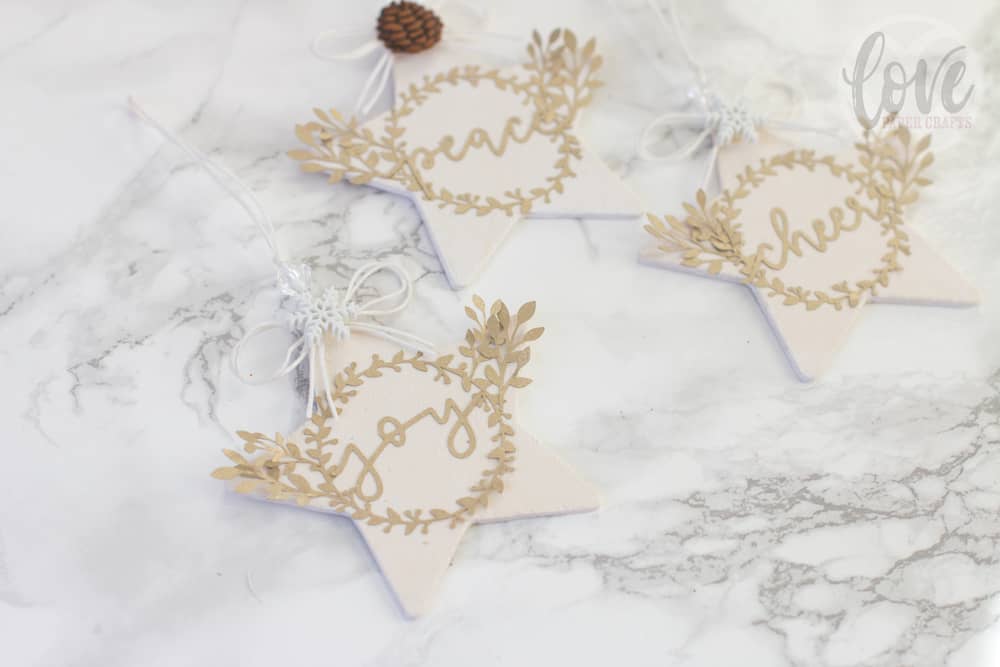
- While I was raiding my stash for Christmas supplies I found some cute Christmas buttons so I added some snowflakes and a pinecone over the bow.
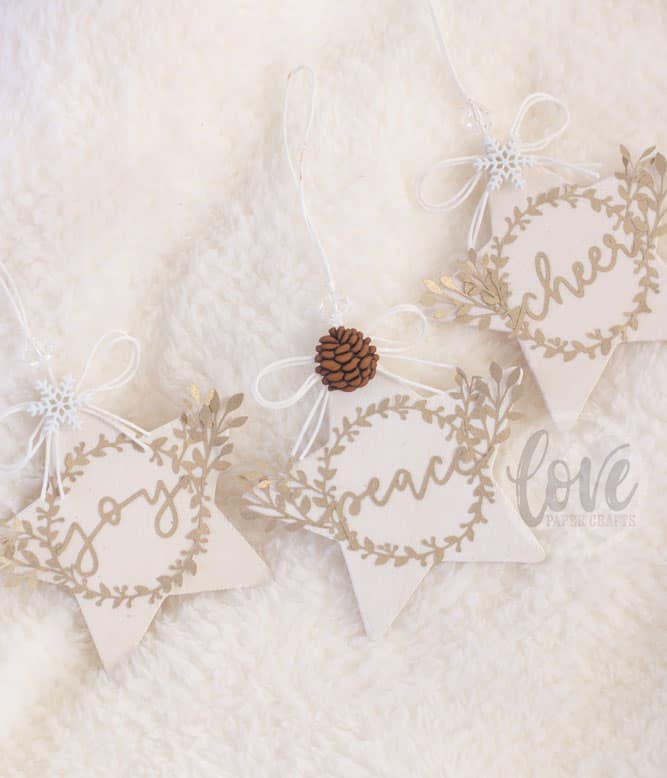
The beads and buttons are totally optional for this piece. Without them the ornament still looks cute and rustic.
Always raid your stash first. You never know what you’ll find that you can use. The beads, buttons, twine and paper were all things I had on hand and worked perfectly for this cute DIY star ornament.
FIND ALL 47 HANDMADE ORNAMENT TUTORIALS BELOW AND SHARE YOURS TOO! Use Hashtag #2017OrnamentExchange so we can see your creations on social media.


These are so cute. I feel like they work with lots of different types of decor as well. Thanks for sharing!
Such a beautiful idea and the ornaments look like they came from an xpensive shop! Simply gorgeous!! #2017OrnamentExchange
How lovely! They look so delicate and pretty. It’s always a great idea to check your craft stash for items to use. Pinned.
I love your ornament! Very pretty and great for any decor! I am part of the exchange too and love seeing what other bloggers are making!
What a sweet ornament. I love how it is so delicate.
These are so gorgeous, I love the wood and gold combination. They turned out beautifully!
These are delicate and just gorgeous! Love that little pinecone!
Kim
What sweet little star ornaments! I’m sure your partner loves them.
The Christmas buttons are a lovely finishing touch. Very sweet.
These are so pretty and delicate. I love how the leaves and words spill off a little bit and the little snowflake/pine cone detail. Thanks again for joining the #2017OrnamentExchange.
I love these! The lettering and foliage wreaths are perfect for the holidays!
I’ve always wanted a crop-a-dile, what a beautiful ornament.
I pinned to my group board. Love participating in the Ornament Exchange I get such amazing ideas!!
These are so pretty, I love the gold on the white!